How to Add a White Outline in Canva

Creating White Outlines around cutout photos is something that has been missing from Canva. Sure along the way there has been a hack or two but they took too much time and didn’t look great. But now with the newest photo editing features in Canva you can create this look in just a few clicks.
You do need Canva Pro for this design style but you can try it free for 45 days with my affiliate link.
How to Create White Outlined Photos in Canva
Step 1: Choose a Photo
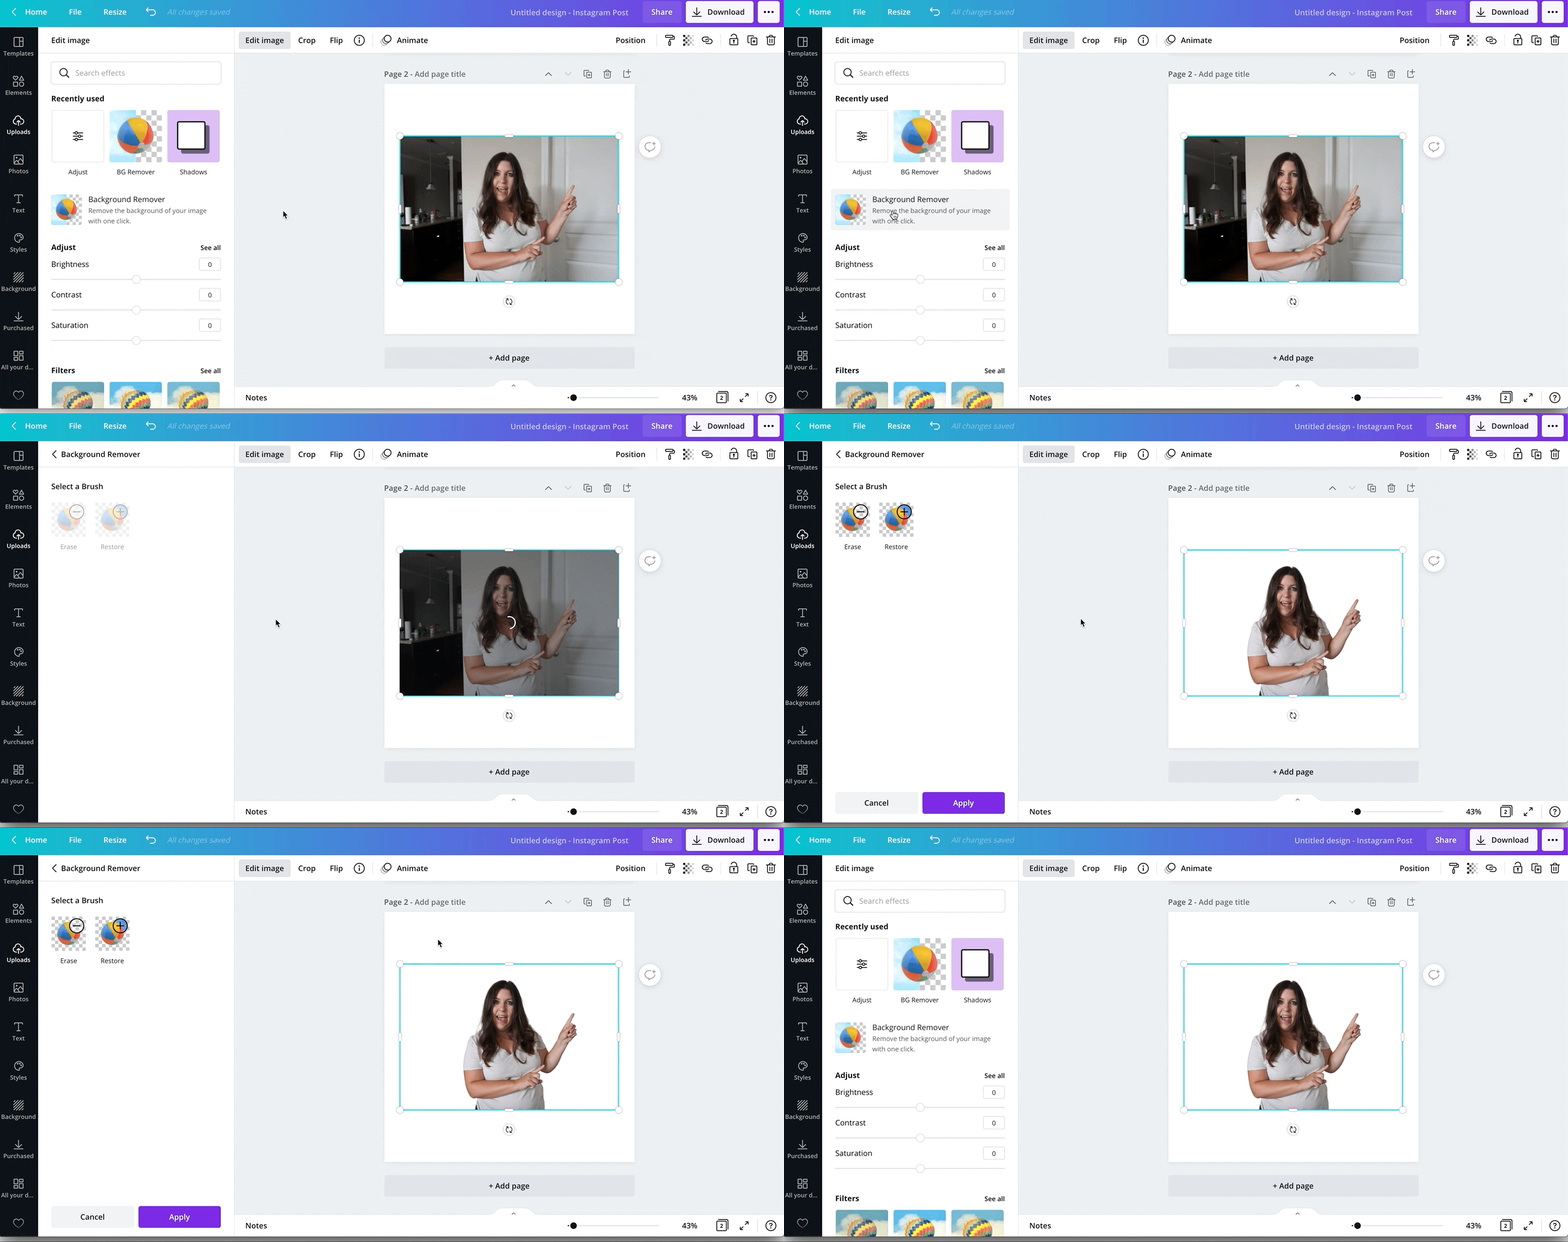
Upload the photo you want to use to Canva. It’s best to choose one that has a clean background around the person.
Step 2: Remove the Background
Select the Photos and Go to Edit Image. Choose the Background Remover.
If you need to touch up anything, use the remove and restore brushes. Then click apply.

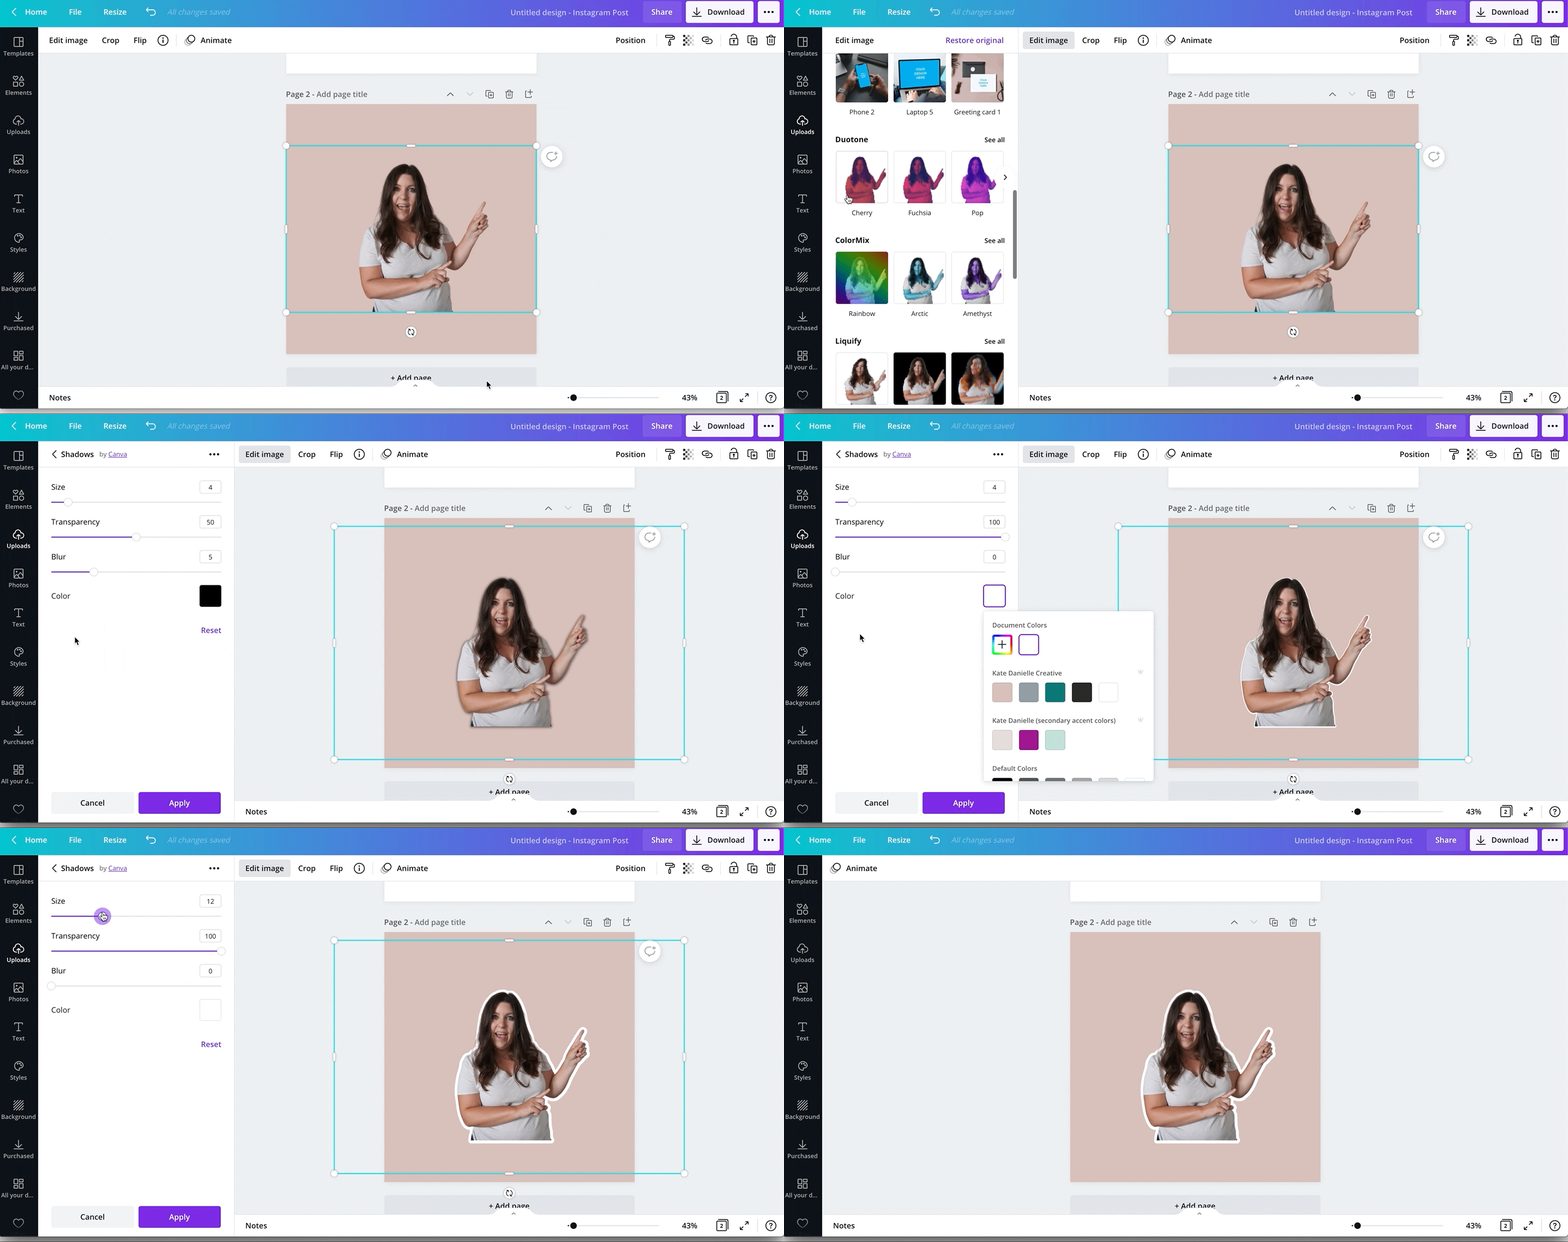
Step 3: Add a background color.
I like to add a color so I can see the white outline but if you want to download with a transparent background be sure to remove the color first.
Step 4: Add the Outline
Go back to Edit Image and under Shadows click glow then click again to adjust settings.
In the control menu set the transparency to 100, the blur to 0 and set the color to white.

That’s it!
To see the steps in action and to troubleshoot any glitches be sure to watch the video tutorial below. Let me know in the comments what kind of graphics you will use this for.


