Using consistent branding not only builds brand recognition but it also will save you so much time. The key is to get your branding set up in Canva. You can easily set up a brand kit in Canva Pro and in Canva, in this post I am going to show how to do that in each version of Canva. I’m also going to show you how to set up brand kits for client work.
But First… If you are thinking:
I don’t like my branding
I can’t settle on a color palette
My branding is all over the place
Or I haven’t even thought about my branding
Then check out these post…
DIY Your Brand: Easy Branding Hack
What You will need to set up your brand kit in Canva
- Your Color Codes (How to Get Colors Codes)
- Brand Fonts (for the Free Version of Canva you will have to pick from the available fonts)
- Logo and any other images or creative elements you plan to use often
Set up Your Brand Kit in Canva Pro:
Canva Pro Makes it super Simple with your very own Brand Section
1. From the Canva Home Screen Click on Brand Kit
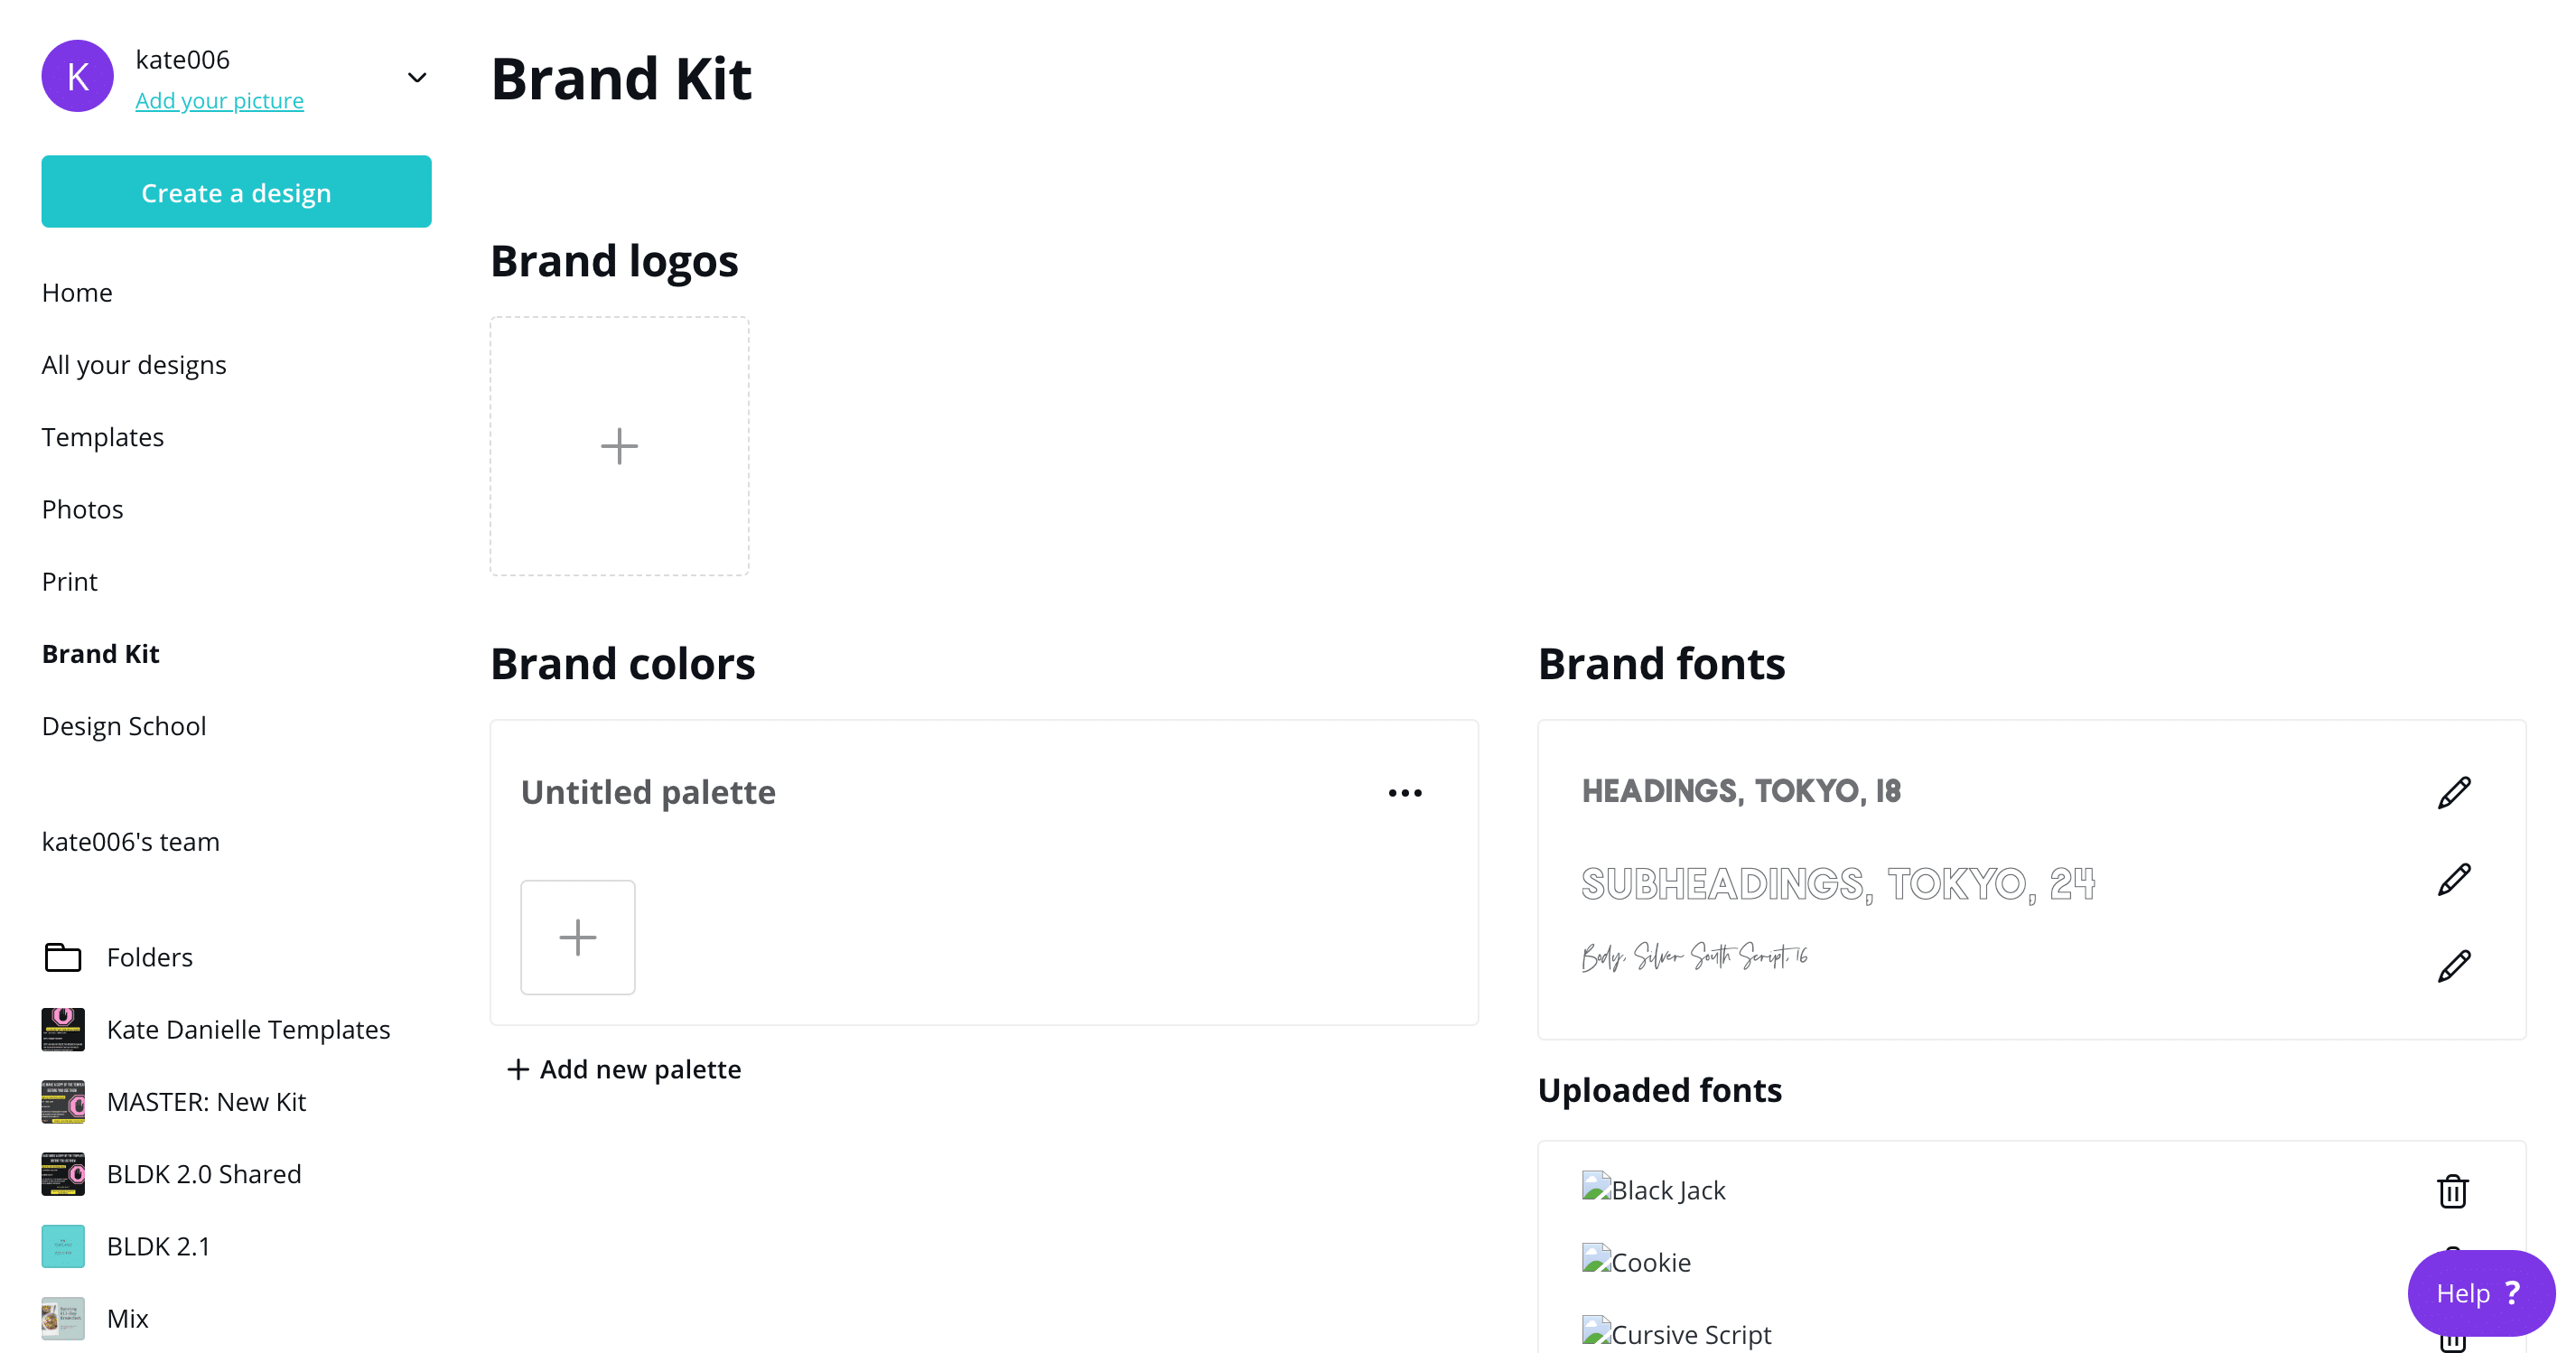
2. Upload your logo and other brand assets to the logo section
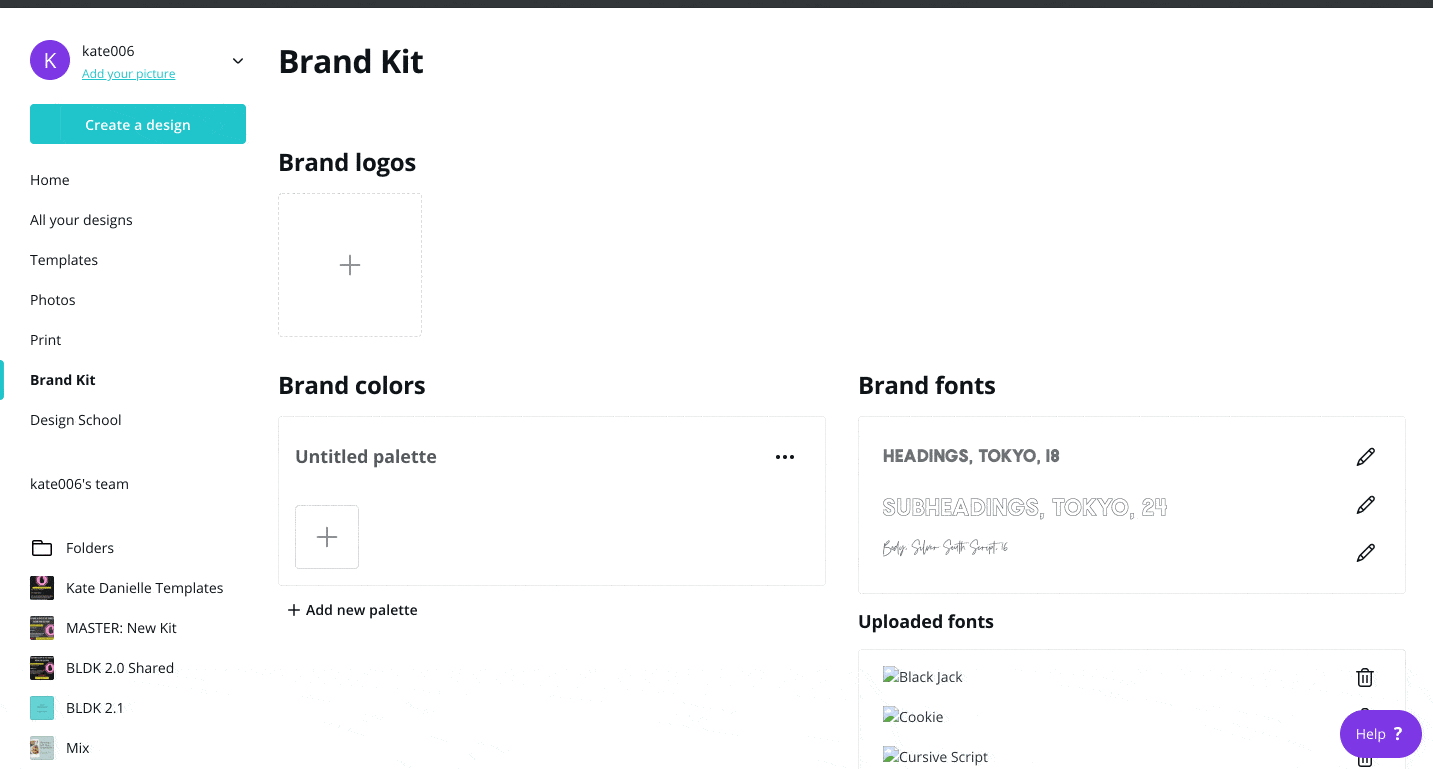
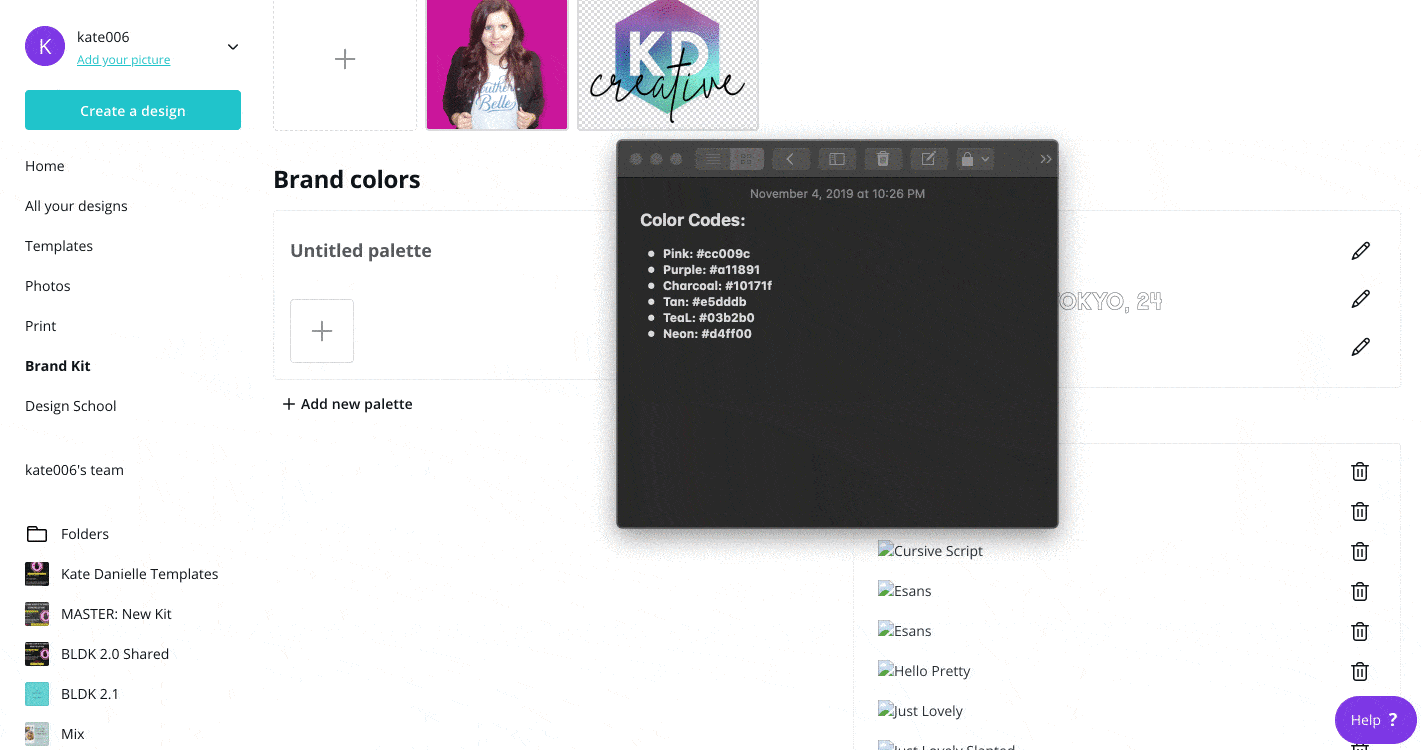
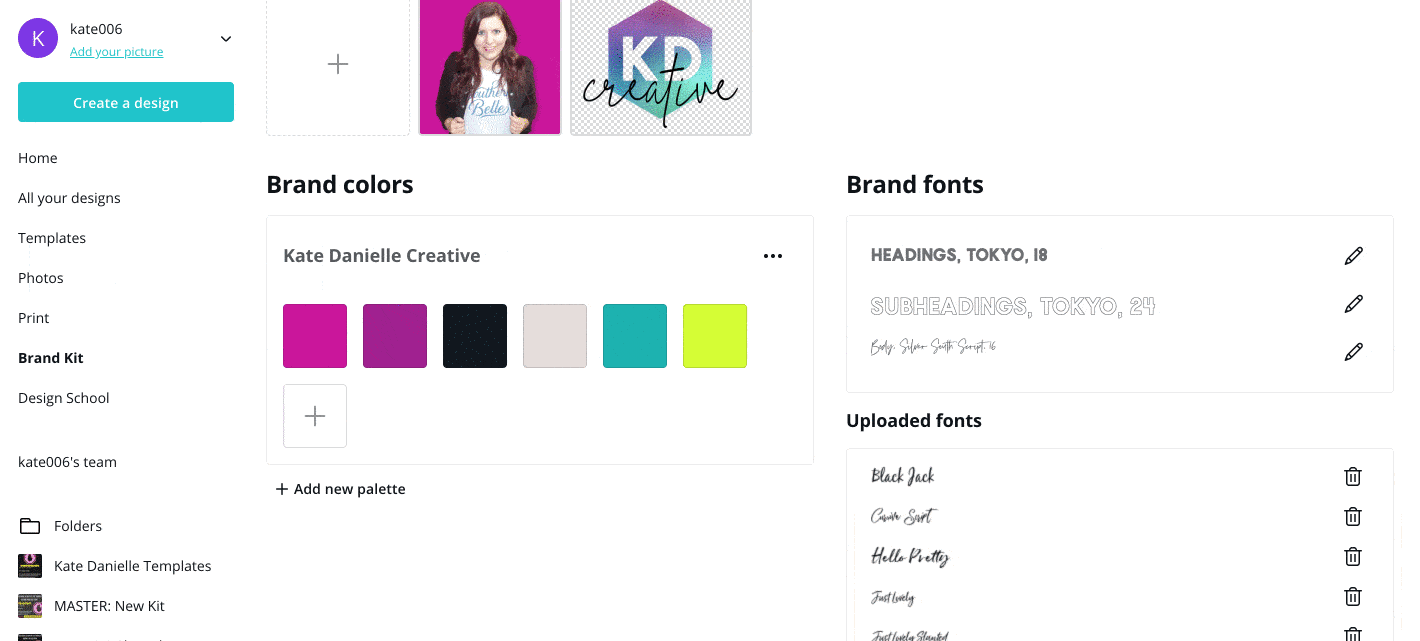
3. Add in your brand colors. I made a note of my color codes to copy and paste in. (How to Get Color Codes). Don’t forget to name your color palette.
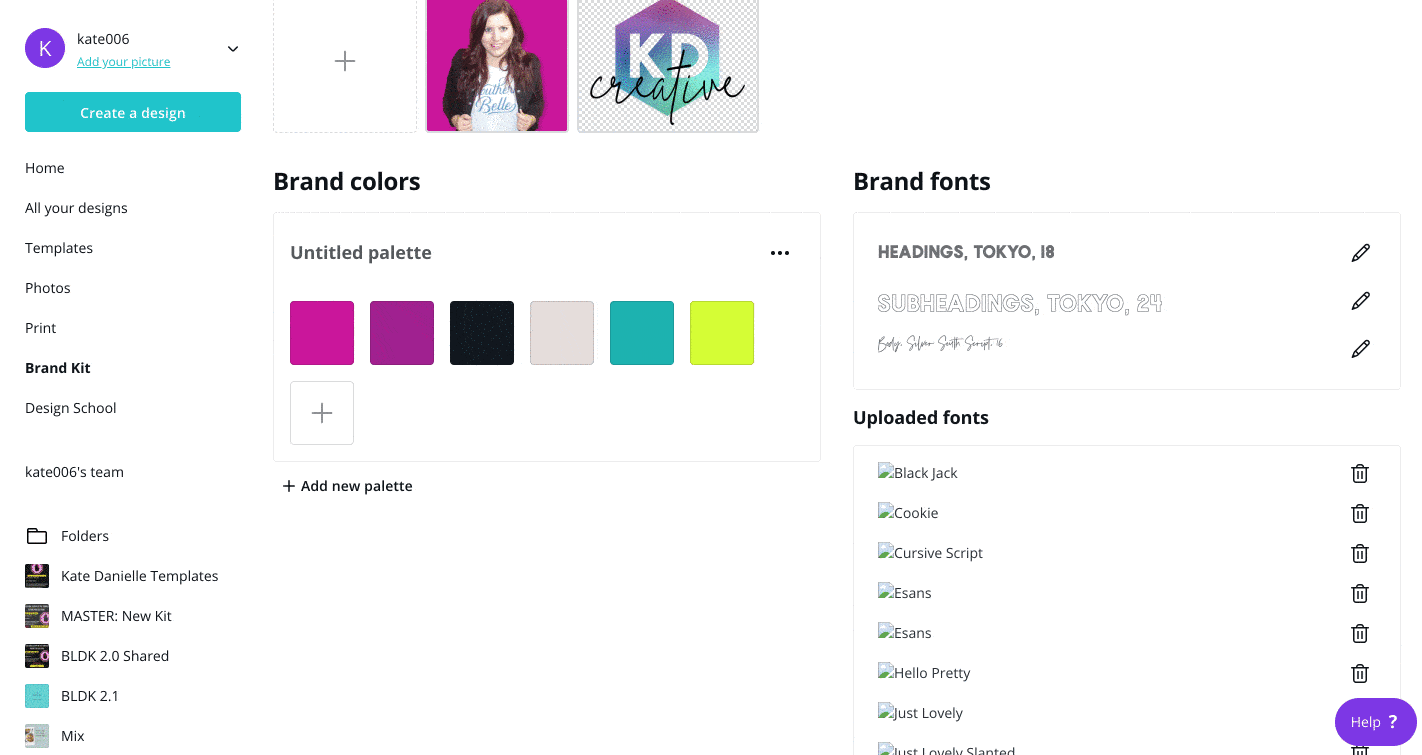
4. Upload any brand fonts you will use or skip this step if you plan to use Canva Pro’s Fonts
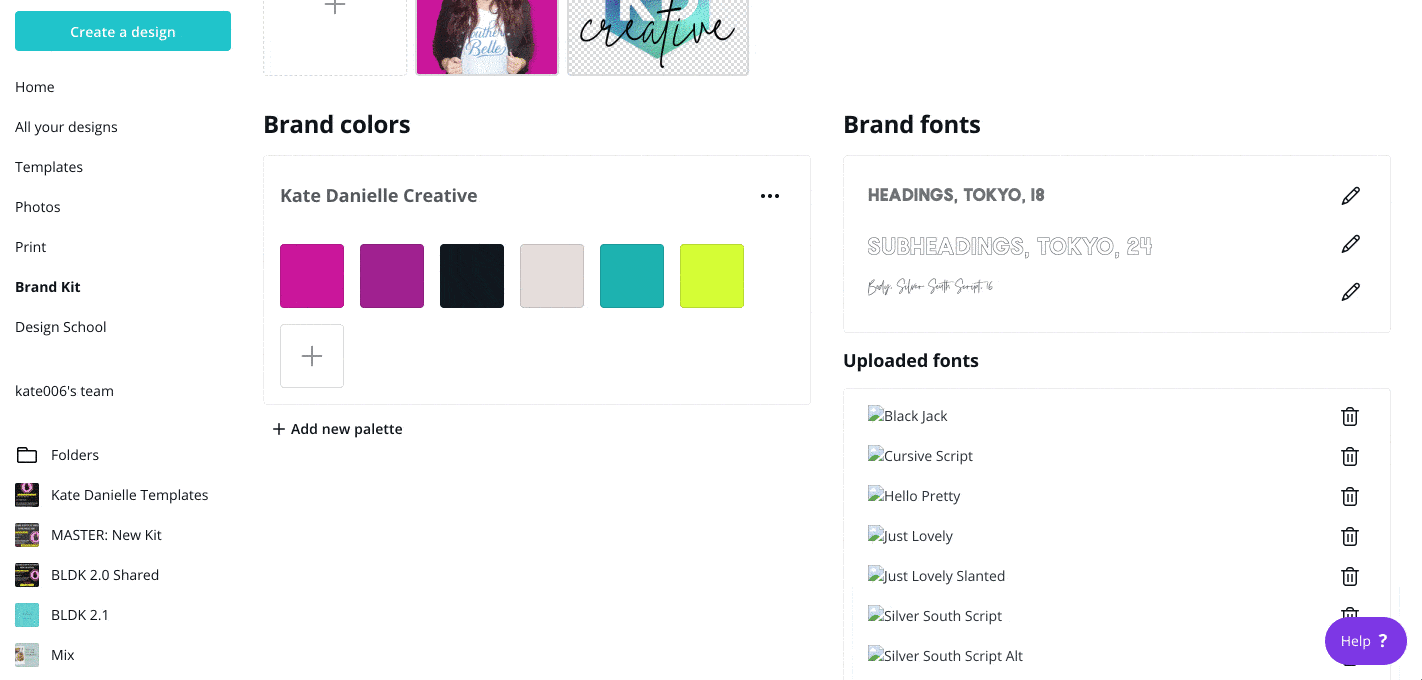
5. Set your Brand Fonts and styles. You can use uploaded fonts and Canva Pro Fonts.
Now watch the clip to see what this looks like on the design side of Canva.
Set up Your Brand Kit in Canva (free version):
In the free version, you can only save 3 brand colors in the brand kit area but below I show you how to store all your branding info by creating a brand guide in Canva. You can also set Brand fonts in the Brand Kit Area.
Optional You can set up to 3 brand colors in the Free Canva Brand Kit. The next steps will show you how to save as many colors as you need but you may want to go ahead and plug in your 3 most used colors. (See step 3 from above).
Create a Brand Style Guide in Canva
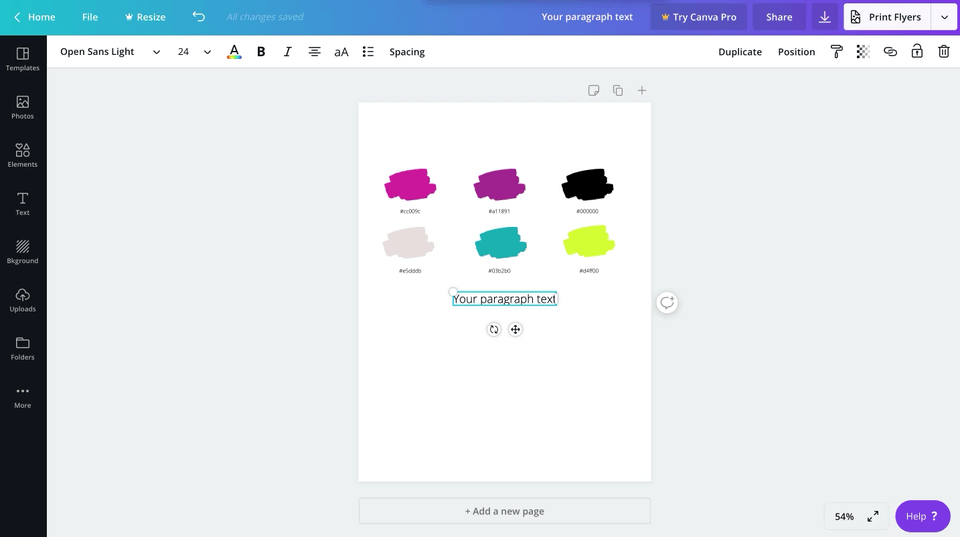
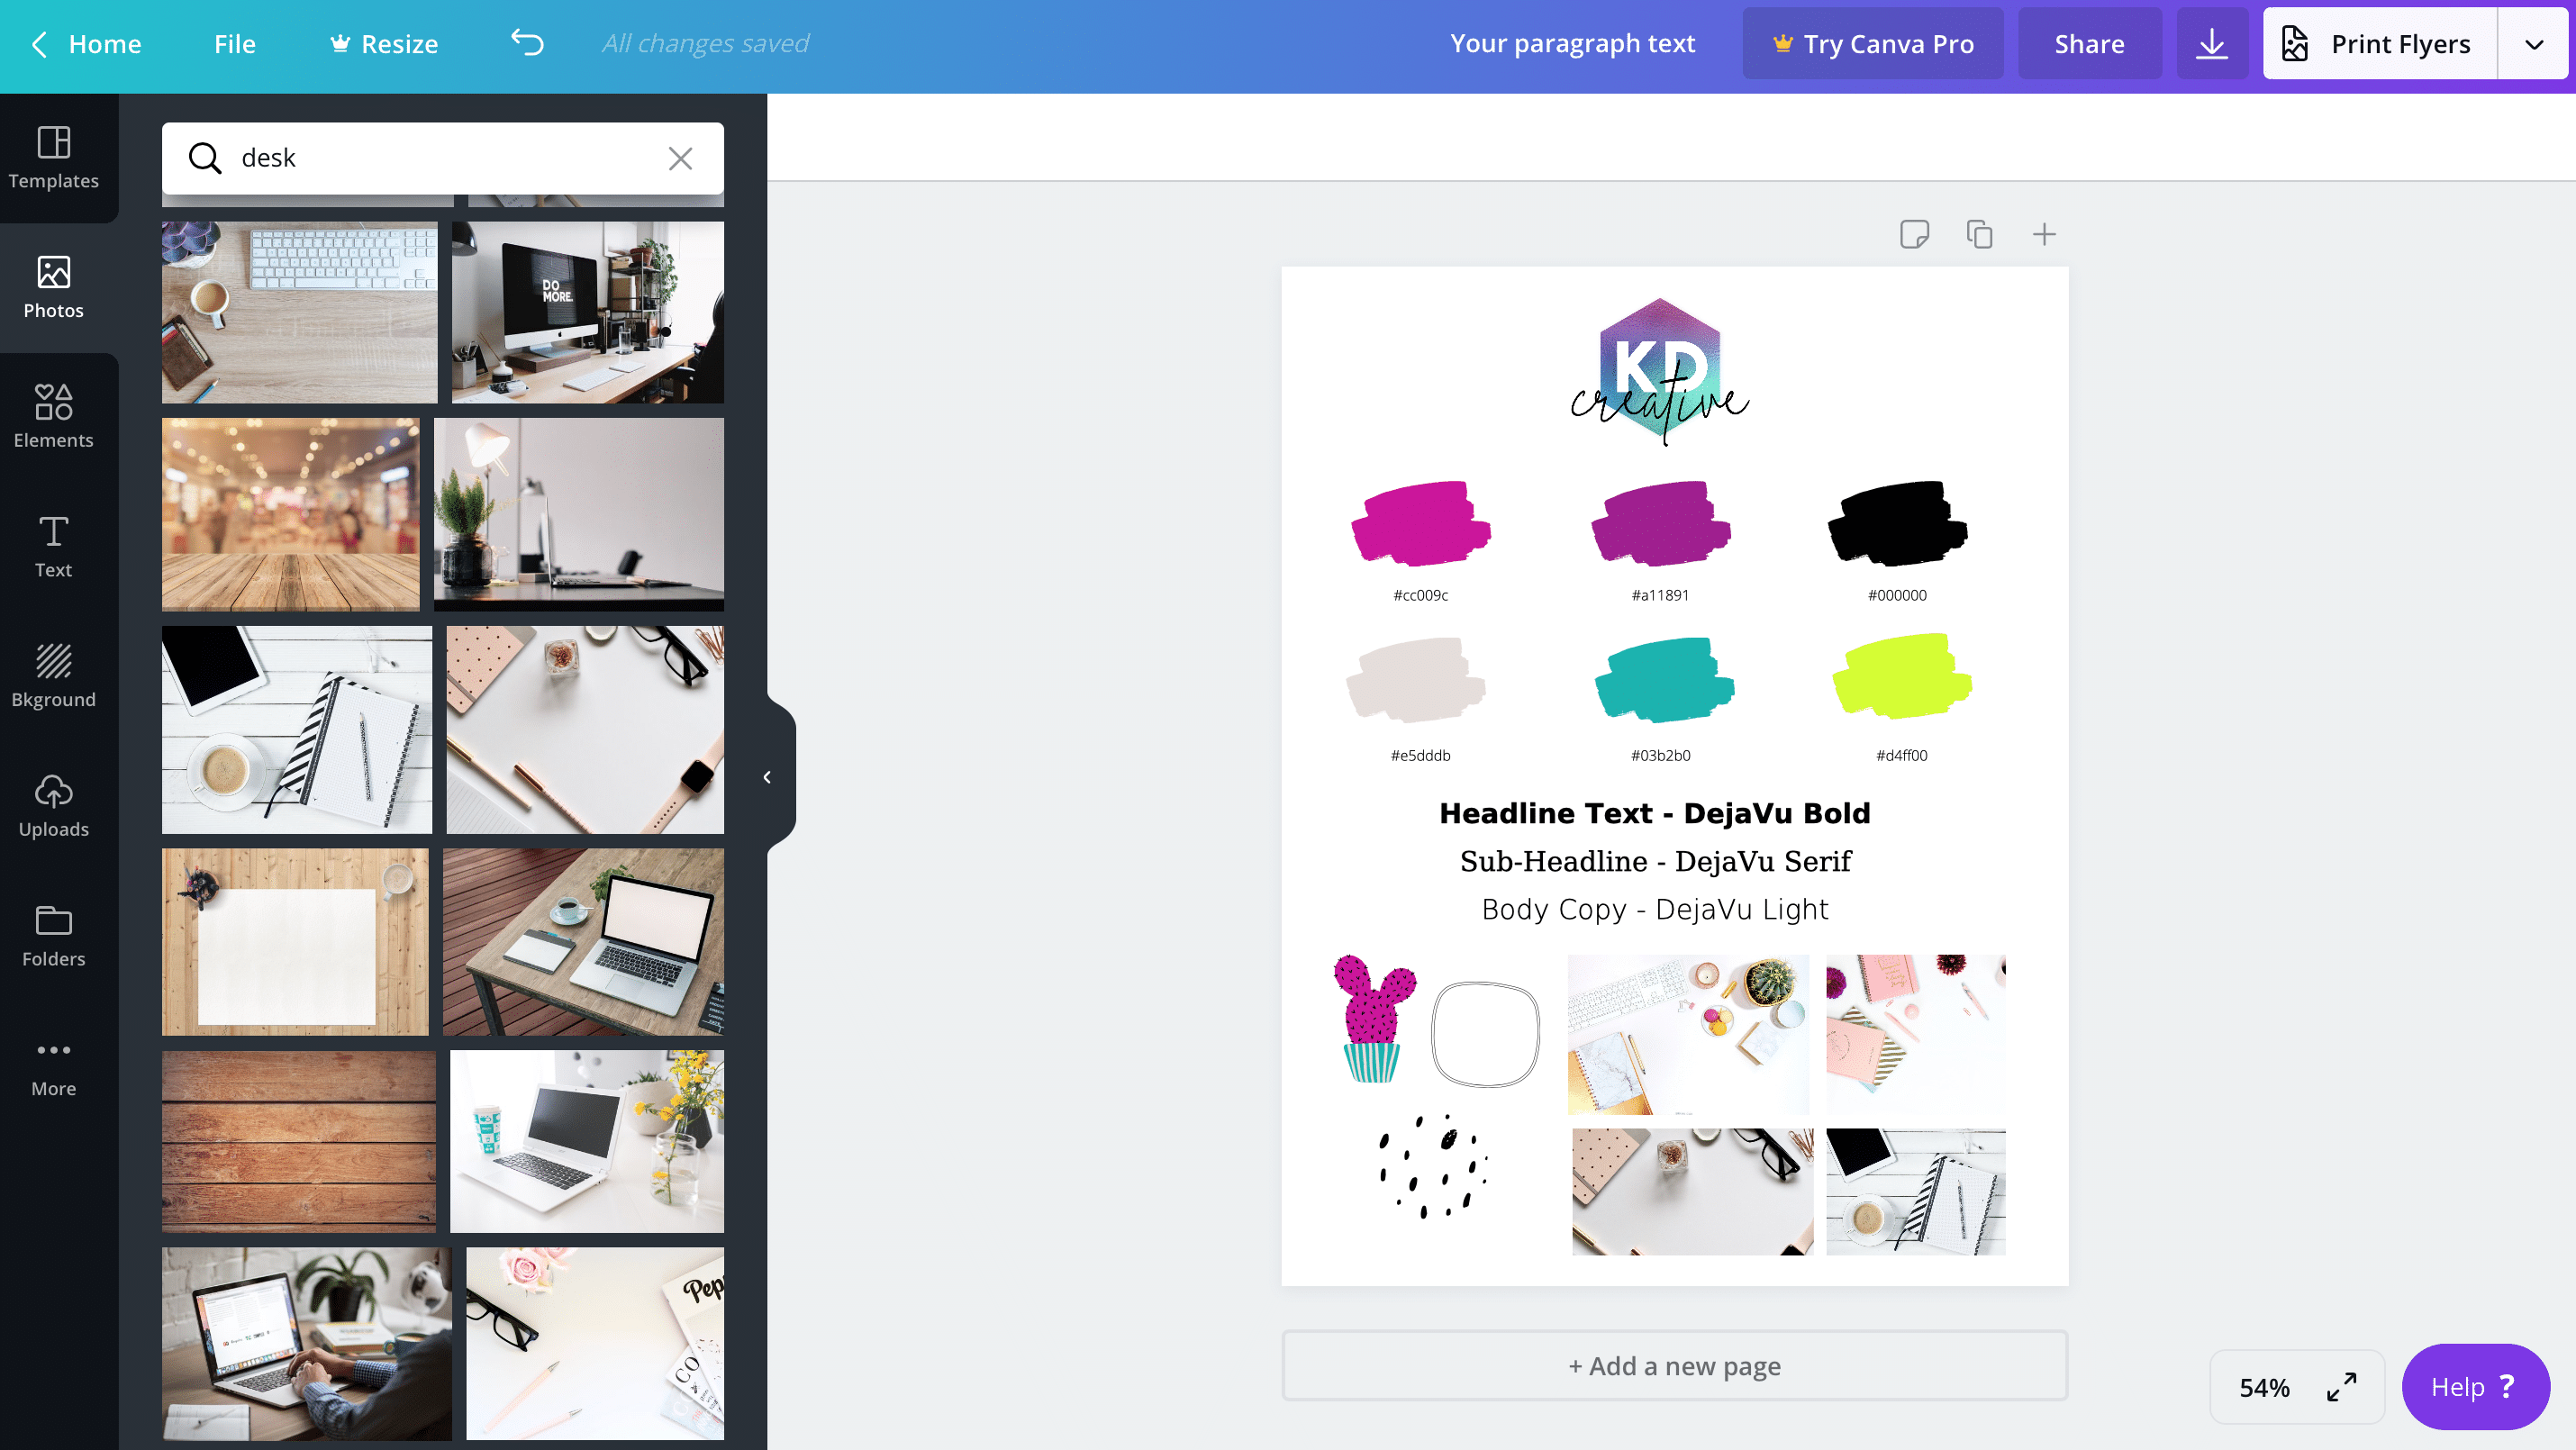
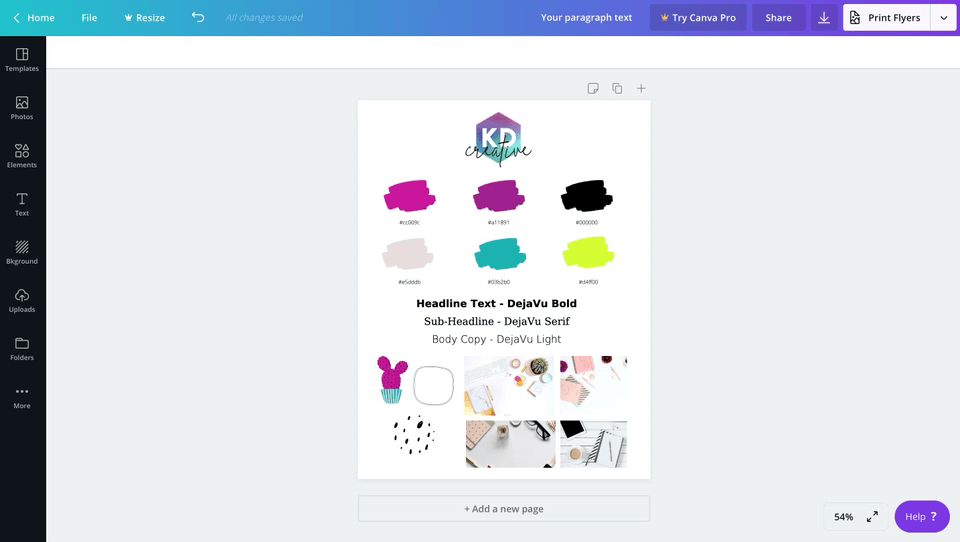
1. Create 5-6 identical shapes. One for each color in your brand palette. These can be squares, circles, or something creative like a paint swash.
2. Color each shape by selecting one then open the color panel hit the + icon to add in your color code. Repeat for each color. You may want to note the color code under each swatch.
3. Create some sample text for your Brand fonts. Include headline, sub-headlines and body text samples.
4. Upload your logo and any other brand assets. You do not have to include them in your brand guide but I think it helps have a cohesive brand guide. You can even take it a step further and add it some of your favorite Canva Elements and photos.
5. Now You can Copy and Paste the elements from your guide onto any design size. The colors will be available in your color panel and the fonts will be right on top of the font list. (use command c and command v to copy and paste)
Lets Recap Setting Up Canva Like a Pro with your Bradning

You must have Your Branding Set with a Color Palette and Fonts
You will need your color codes, here is a tutorial on how to get your color codes. If you have not set your branding yet, check out this post.

Canva Pro Has a Brand Section
Canva Pro is more streamlined with a Brand Section for you but you can make a brand guide and have all your colors and fonts stored in the free version of Canva.

The Next Step to Using Canva a like a pro is to Apply Your Branding to Templates
Want to see how to quickly apply your branding to templates and snag a sample of my premium Canva Templates? Sign up below!
This post may contain affiliate links with my honest opinion.